Update 4/23/26: E-Mail notifications are still working as expected with Wave and Gmail. The tutorial below is still valid.
Update 6/1/22: Gmail disabled “Allow less secure app” access as of May 30th, 2022 and now requires 2-Step Verification and App Passwords to be enabled. Our tutorial below has been updated to reflect this change.
Voice Mail to E-mail Notification is a popular feature in Vertical Wave. While many users opt to use their own E-mail servers for this, others may want to use a 3rd party e-mail service such as Gmail. This tutorial will walk you through the process to setup Wave’s Voice Mail to E-mail Notification service with a Gmail account.
If you do not already have a Gmail account to use, go to https://www.gmail.com to create a new E-mail account.
Note: The locations of these settings below may vary based on your appearance settings within Gmail.
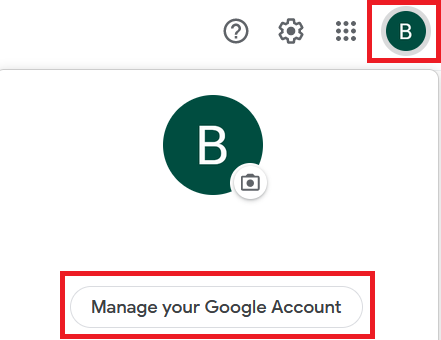
Login to your Gmail account, then click on your profile icon at the top right corner of the screen and click “Manage your Google Account“:
Click “Security & sign-in” from the menu on the left, then “2-Step Verification” on the right.
There are two steps to complete:
Step 1 – Enable 2-Step Verification (click and follow the prompts)
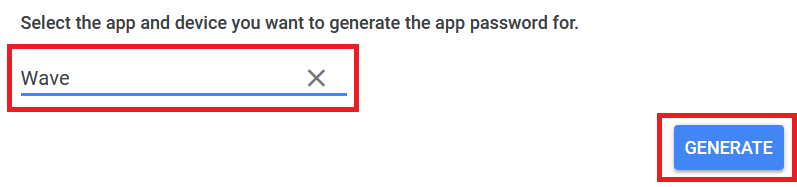
Step 2 – Scroll down to “App passwords”. Create a new app specific password, give it a name of your choice (such as “Wave”) and note the password generated by Google.
Once complete, open up a Remote Desktop Connection to your Wave server and login, then run TVAdmin and login.
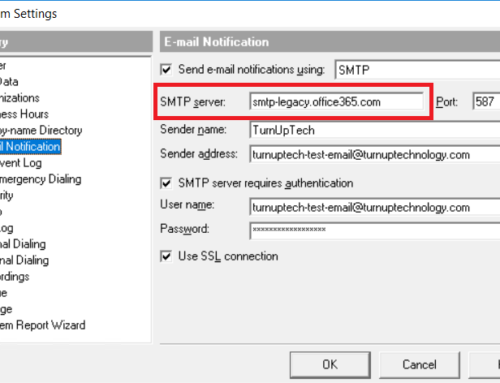
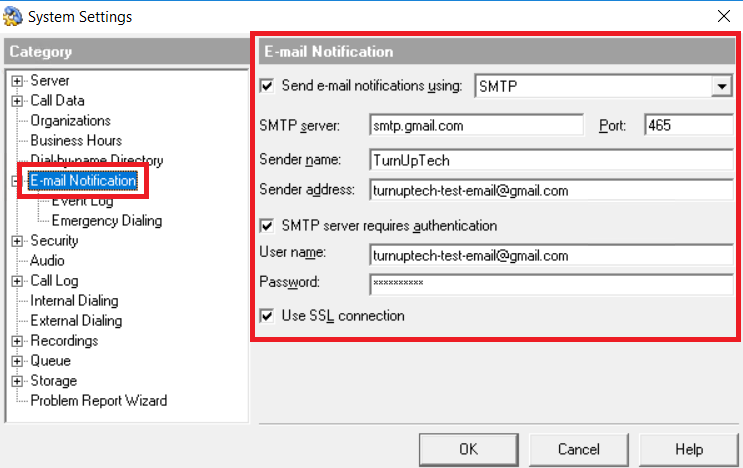
From the top menu in TVAdmin, go to Tools / System Settings / E-mail Notification and configure the settings as follows (replacing your Sender name, Sender address and user name/password with your own)
Important: You must use the unique “App Password” provided to you by Gmail in the “Password” field.
Click OK.
Now you may open a user within TVAdmin, go to Voice Mail / E-mail Notification and enable this for each user:
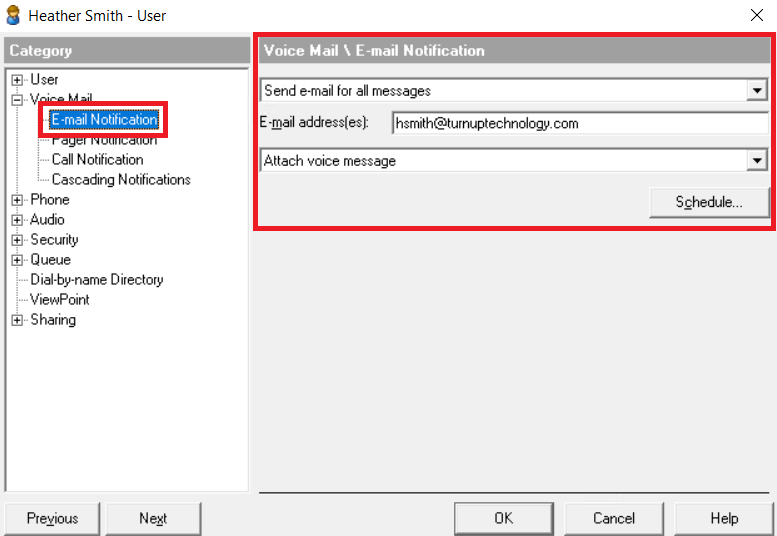
Click OK when complete.
Voice Mail to E-mail Notifications should now work as expected. Be sure to check your Junk / Spam folder if you’re not receiving them!
Need additional help? Feel free to contact us – we are always glad to assist!