Robo-calls and general spam calls can be quite a nuisance, not only consuming valuable time of users, but also consuming your trunks for the duration of these unwanted calls. Fortunately, we have a couple of options to help with this:
Option 1 – Block the calls at the carrier level:
If the caller always uses the same inbound number(s), contact your carrier and request they block these calls at the carrier level so they don’t make it to your phone system. This is the preferred method when possible, as calls simply stop at the carrier before reaching your system, never consuming any of your trunks. This may not be an option with all carriers, or it may take your carrier days block a specific number, in which case you may want to follow a different course of action (below).
Option 2 – Use Wave to hang up on the unwanted caller:
Using Wave’s “Inbound Routing Table”, we can send specific callers (based on their Caller ID) to a “utility” user where the call is disconnected. You may also choose to play a custom greeting before disconnecting the call (you may want to get creative with this greeting!). If you choose to simply hang on the caller without a greeting, often times this process will occur so quickly that the unwanted caller will just receive a fast busy or out-of-service tone, which may result in automated calling systemsremoving your number from their call list. To do this, we’ll need to follow a few steps which do require knowledge of Wave’s areas of administration. If you are not familiar with Wave’s areas of administration, please contact us and we’d be glad to assist!
Step 1 – Create a “utility” user in TVAdmin (This will NOT consume a Wave User License):
Use Remote Desktop access the console of the Wave server. Launch TVAdmin, go to “Users”, then create a new user.
Give the user a name, extension, password, and under “Associated device”, choose “No slot selected” and “No port selected”. Make note of the extension as we’ll need it for step 3.

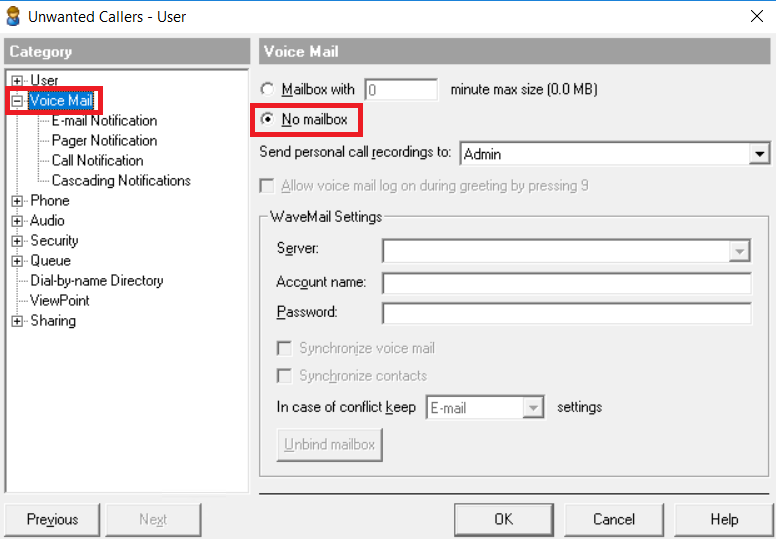
Click “Voice Mail” then select “No Mailbox”:
Click OK when finished to save this new user. We are now done with TVAdmin, feel free to close it.
Step 2: Create a Routing List for this new “Unwanted Callers” utility user to hang up on the unwanted callers.
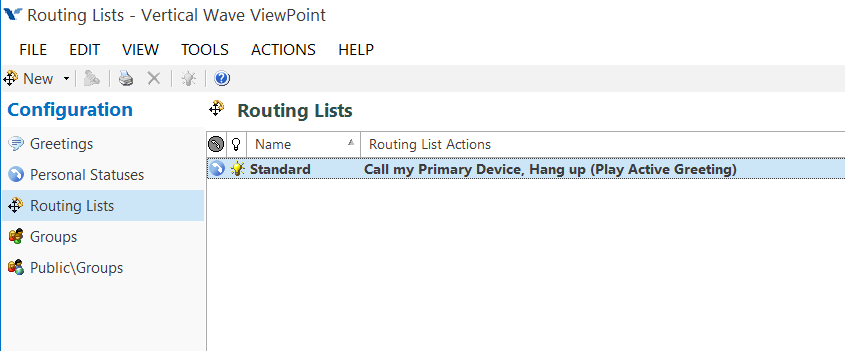
From a workstation, launch Wave ViewPoint, and login as this newly created “Unwanted Callers” user. Once in ViewPoint, from the top menu go to View / Go To / Routing Lists:
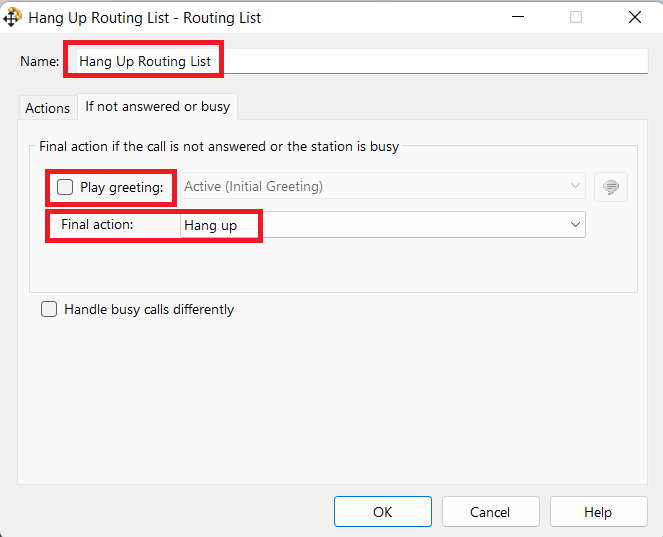
Right click in the open area and select “New Routing List” (then choose “Routing List Editor” if prompted), give it a name of your choice, then click the “If not answered or busy” tab.
Uncheck “Play greeting”, then set to “Final action” to “Hang up”:
Click OK when finished to save this new routing list.
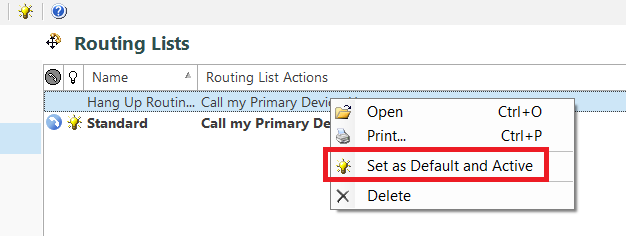
Right click on the new routing list and select “Set as Default and Active”:
We are now done with ViewPoint, feel free to close it.
Step 3 – Create a new rule in Wave’s “Inbound Routing Table”:
Note: In rare cases, we’ll find a system which is using “Scheduled Routing” only. This procedure will only work if you are using “Route By Source or Dialed Number” or “Both” within Wave’s Inbound Routing Table (“Both” is the most common method used). This will not work if you are using “Scheduled Routing” only.
Go back to the console of the Wave server and use Internet Explorer to login to Wave Global Administrator (web interface).
Once logged in, open the appropriate Inbound Routing Table based on the type of trunk being used. This is found under the “Administration” tab in Global Administrator, toward the bottom of the page.
- T1/PRI Trunks: Click on “Trunk Groups” and find the Trunk Group associated with your T1/PRI. In most cases this is “Voice Digital”, but you may have a custom trunk group identifying your specific T1/PRI circuit. Open it up by clicking “Edit”, then click “Edit Inbound Routing Table”.
- SIP Trunks: Click on “IP Telephony”, then “Signaling Control Points”, find your SIP Trunk in the list, click “Edit” to open it, then click “Edit Inbound Routing Table”
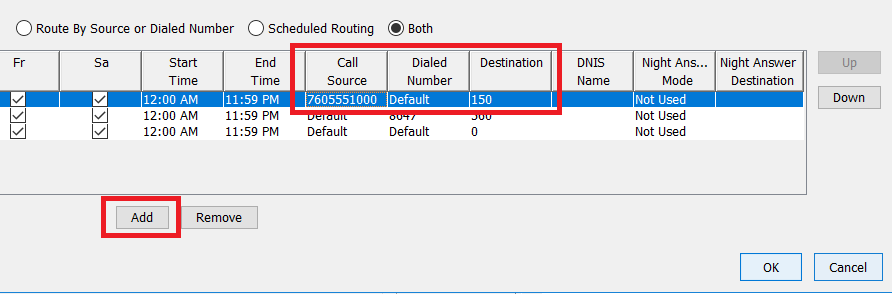
We’ll be creating a new entry in the Inbound Routing Table, so click “Add”, then fill in the appropriate information in your new entry. We are only concerned with two fields here:
Call Source: Enter the Caller ID number of the unwanted caller. Note this may or may not be prefixed with a “1” depending on how the carrier is sending the caller ID.
Destination: Enter the extension number of the utility user we created in Step 1. In our example, we assigned our “Unwanted Callers” utility user an extension of “150”.
In this example below, we are sending our unwanted caller with the Caller ID of “7605551000” to our utility user at extension “150”.
Use the “Up” button on the right side of the window to move your new rule to the top of your list (or somewhere above your bottom “Default / Default” rule). Without moving this rule above your “Default / Default” rule, it will not be triggered.
Click OK / OK / Apply / Done when finished to apply this change.
This should now be working as expected!
Adding more numbers to this blocked list is as easy as creating additional rules in the inbound routing table.
Not working as expected?
- Double check to see if the unwanted Caller ID is prefixed with a “1” or not and make the appropriate adjustment to the “Call Source” number.
- Be sure your new rule is at the top of the Inbound Routing Table list, or somewhere above your “Default / Default” rule (which is typically at the bottom of the list).
Additional suggestion:
Submit your phone numbers to the FTC National Do Not Call Registry
If you have many DIDs, this can take a while to register all of your phone numbers (you can register 3 numbers per submission), however we have seen this result in a significant decrease of unwanted spam calls and robo-calls.
Need additional help? Feel free to contact us – we are always glad to assist!