With more and more businesses allowing their employees to work from home, the demand for remote IP phone connectivity has been on the rise. While a remote IP deskphone is ideal, it does typically require a VPN setup to work properly (such as your own hardware-based VPN setup, or using an IP phone with a built-in OpenVPN client such as the VIP-9000 series IP phones).
Wave ViewPoint Desktop does have a built-in softphone, however, using Wave ViewPoint Desktop does require a fast network connection with low latency (Ideally a LAN, or a point-to-point network). If you’re attempting to use the Wave ViewPoint Desktop over a VPN from a remote location, you may find it slow and problematic without a very fast and low-latency connection. When using ViewPoint Desktop in a remote office, we’d suggest using a point-to-point connection, which is typically not feasible for individual users working from home.
The alternative to using a physical IP phone at a remote location is to use a 3rd party softphone. A softphone is just what it sounds like – a software-based telephone. This is an application that runs on your workstation (Windows, Mac, Linux) and is combined with a PC-connected headset. Keep in mind that the audio quality of a softphone is typically not on par with the audio quality of a physical deskphone.
This tutorial will guide you through the setup of a softphone, both on the Wave server side, and on the remote workstation.
Requirements:
- Vertical Wave version 4.5 or higher.
- A Wave User License (if you’re moving an existing user from in-office to their remote location, you’ll already have a user license)
- A Wave 3rd Party Generic IP Phone License
- A 3rd party IP Softphone of your choice. A couple of popular, free examples are the 3CX Softphone (which we are using in this tutorial) or the Bria Solo Free Softphone.
- A good quality USB headset of your choice. A softphone will use your PC’s audio input/output device, so while its possible to use your typical PC speakers and microphone, you’ll likely want a good quality USB headset if you’re using the softphone regularly.
- Your remote workstation should be connected to your office network via a VPN. Most businesses with remote employees will have a software-based VPN solution in place for their remote employees to be able to access resources on the office network (such as the VPN functionality built into Windows, a VPN client application they run when they login each day, etc.). The softphone application will work when the remote workstation can “see” the servers at the office on the network.
Fortunately, most softphone applications will look very similar in terms of setup, so you can use these instructions to below to setup another softphone of your choice.
Let’s begin..
Step 1 – Setup the Wave user to use a 3rd Party SIP Device
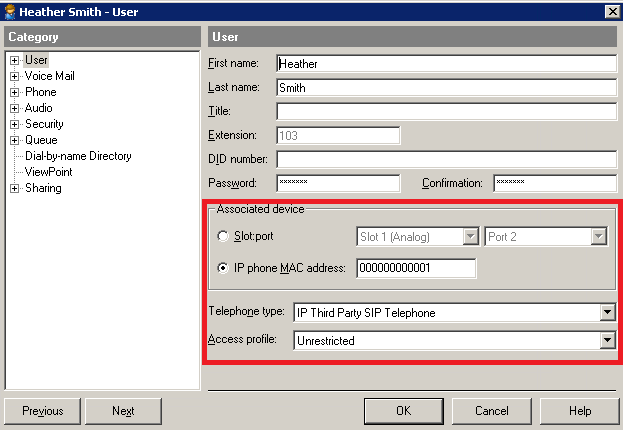
We’re first going to setup your Wave user for softphone connectivity. To do this, access the administration console of your Wave system, run TVAdmin, go to the User Section, then open the user of your choice. In this example, we are working with the user “Heather Smith” at extension 103.
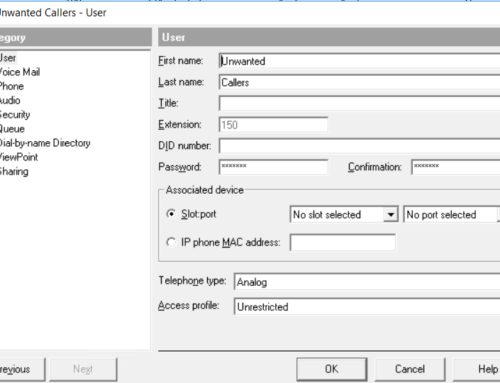
Under “Associated device”, choose “IP phone MAC address:” and use a MAC address of your choice as shown below (A 3rd party softphone will not pull down a configuration file from the Wave server when using a 3rd party softphone, so you could use “000000000001” for the first user, “000000000002” for the second user, and so on).
For “Telephone type”, select “IP Third Party SIP Telephone”. Note: If you do not have this option available, you’ll need a Wave 3rd Party Generic IP Phone License as mentioned above.
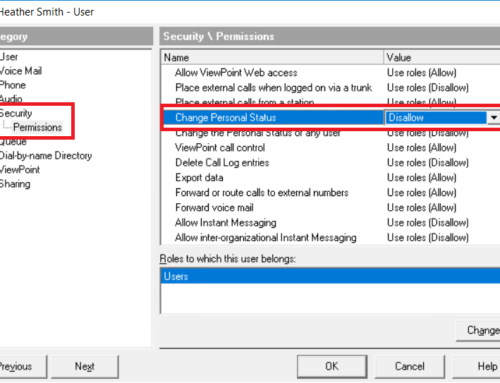
Now expand “Phone” at the left, then click on “SIP”. Wave generates a secure authentication password here. Change the “SIP authentication password” to a password of your choice (and confirm in the Confirmation box below). Do not change the “SIP authentication username”. Make a note of the “SIP authentication username” as we will use this to setup the softphone application.
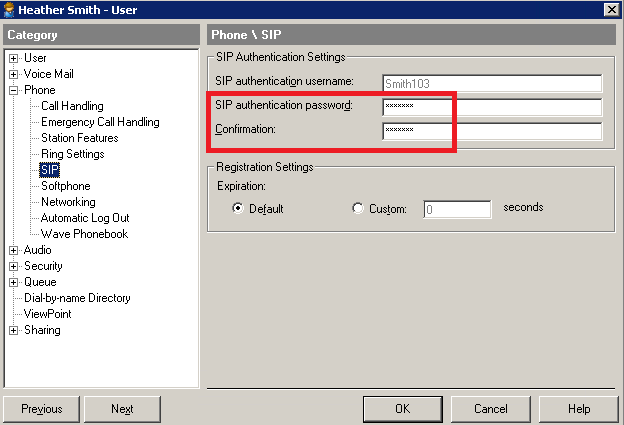
Click OK when finished. We’re done with the Wave side, so you can close TVAdmin, then logoff of the Wave console.
Step 2 – Configure the softphone application on the workstation
This will vary based on what 3rd party softphone application you choose, however, most will look similar in terms of setup. We typically just need 4 pieces of information here:
- The extension of the Wave user
- The Authentication ID of the Wave user
- The Authentication password of the Wave user
- The IP address of the Wave system
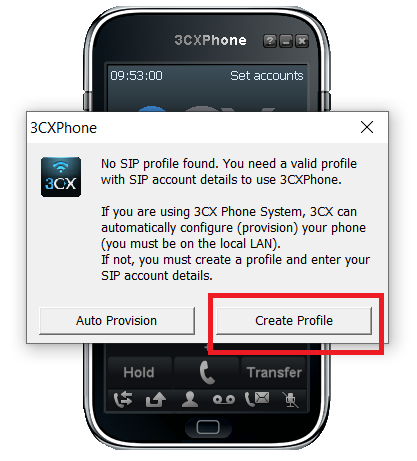
For this example, we’ll use the popular 3CX Softphone application. Once installed, on first launch you’ll be prompted to “Auto Provision” or “Create Profile”. Click “Create Profile”
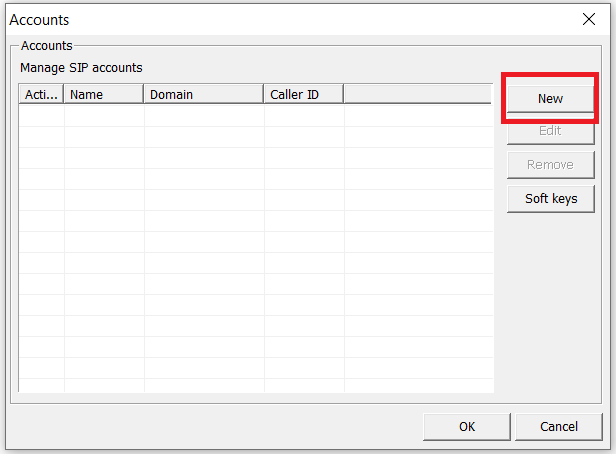
At the Accounts window, click “New”
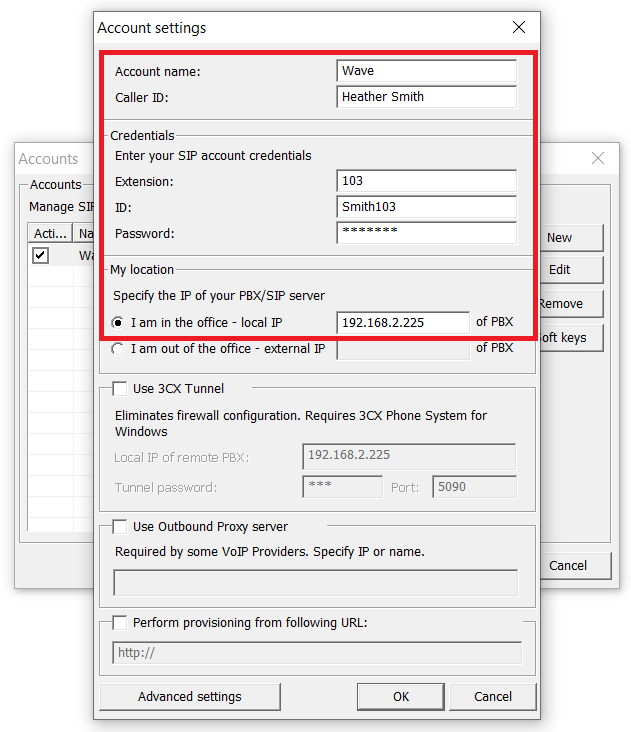
Then at the Account settings window, use the following:
Account name: Anything you’d like
Caller ID: Anything you’d like
Extension: This is the extension of your Wave user. In this example, our user Heather Smith is extension 103, so we use “103” here.
ID: This is the “SIP authentication username” from TVAdmin which you noted earlier. In our case, it is “Smith103”.
Password: This is the “SIP authentication password” from TVAdmin which you created earlier.
I am in the office – local IP: This is the IP address of your Wave server. Remember, your workstation should be connected to your office network via a VPN, so the local IP of Wave is used here.
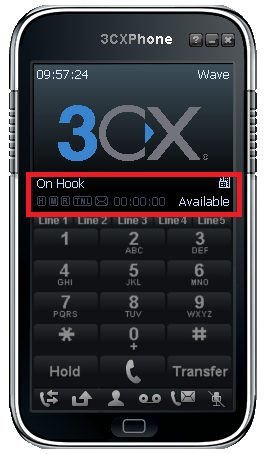
Click OK when finished, then OK again at the Accounts screen. The softphone app should register within a few seconds and appear “On Hook” as shown in the screenshot below:
You should now be able to place and receive calls using the softphone. Note that you’ll want a good quality USB PC headset to use with the softphone.
Please feel free to contact us with any questions – we are glad to assist!