Live Image for Vertical Wave is one of the most popular licensed applications, and for good reason. Live Image creates a snapshot backup image of your Wave system’s C drive, providing an easy method of restoring if needed. This is a complete image of the C drive, so everything is preserved – all call logs, licenses, settings, etc. It is important to remember that because Live Image grabs an image of the C drive only, if you’re storing your Voice Files on the D drive, you’ll need to manually back those up as well. Let’s go through the process of creating a Live Image backup.
Note that Live Image does require a license – if you do not currently have a license for Live Image, it may be purchased HERE.
We recommend following the “How to free up disk space on your Wave IP500 or IP2500” tutorial before proceeding as this may reduce the overall size of the Live Image backup.
In addition to a Live Image license, you will need a USB 2.0 flash/thumb drive for the Live Image restore process. We recommend a 32GB+ Sandisk USB 2.0 drive. You can use the official Vertical Live Image 32GB USB drive as its a known compatible flash drive for use with Wave.
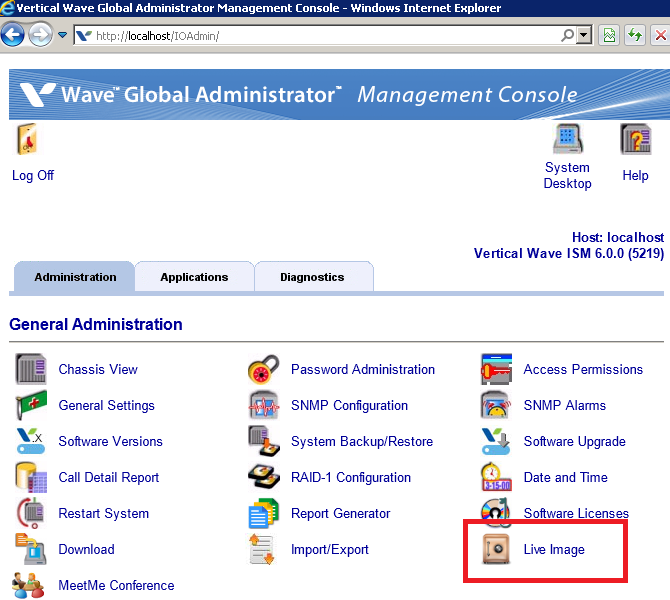
Login to your Wave Global Administrator, then click on “Live Image”:
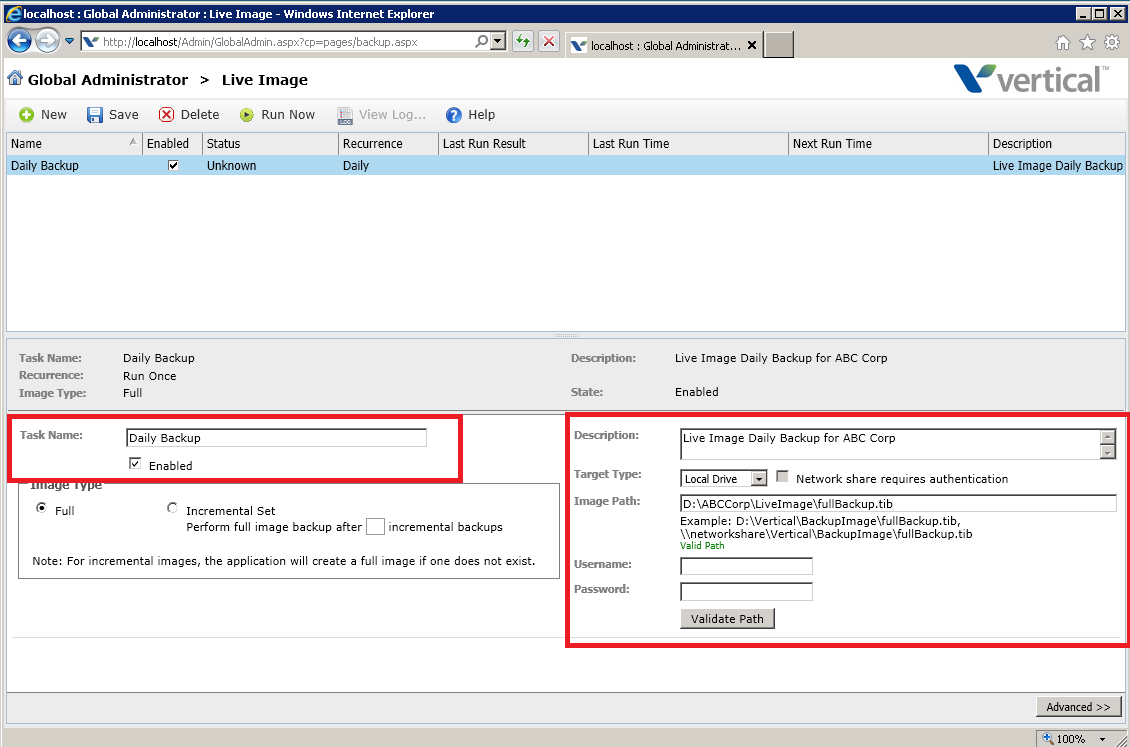
You’ll be presented with the default Live Image setup screen as follows:

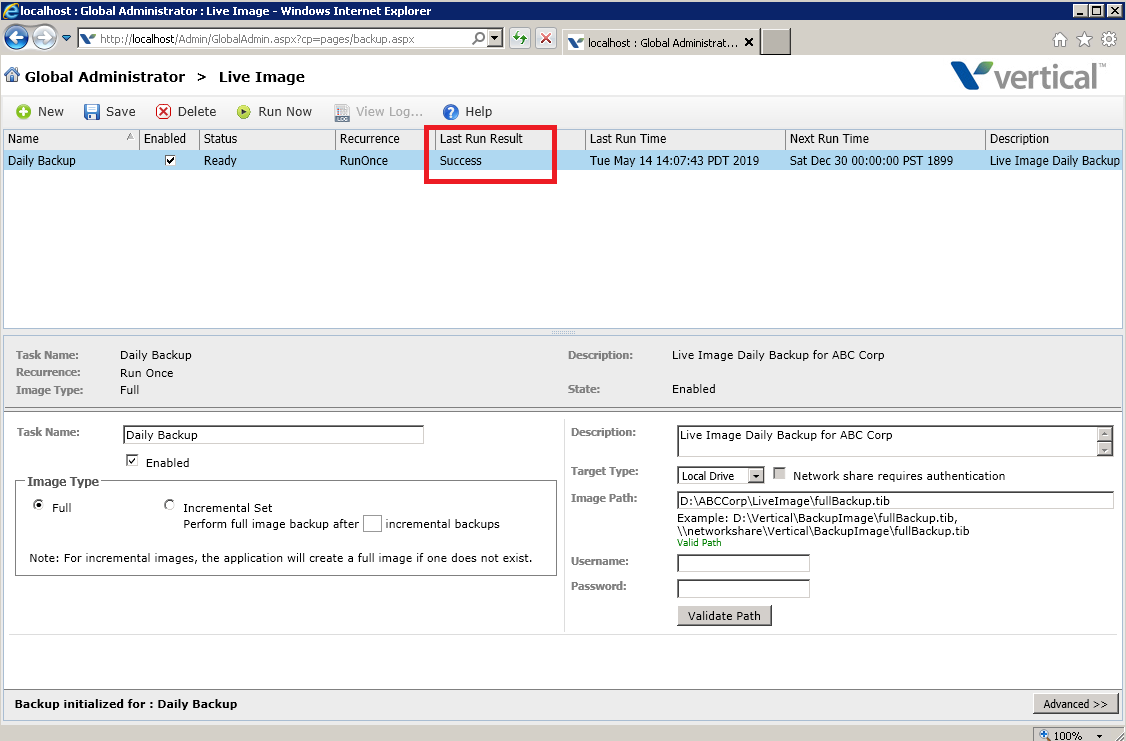
In “Task Name”, give it a name of your choice such as “Daily Backup”, “Weekly Backup”, etc. On the right side, choose if you’d like the backup image to be stored on a local drive or a network location. Note that you cannot store the Live Image backup on the Wave system’s C drive or directly to a USB Flash Drive. Once you’ve provided a full backup image path, click “Validate Path” and you should see “Valid Path” in green.
Now click on “Advanced >>” at the bottom right to define the backup schedule. You can do a test run by selecting “Run Once” here, or go ahead and define your desired schedule. When done, click “Save” at the top of the screen. If you selected “Run Once” in the previous step, you can then click “Run Now” to create your first Live Image backup.
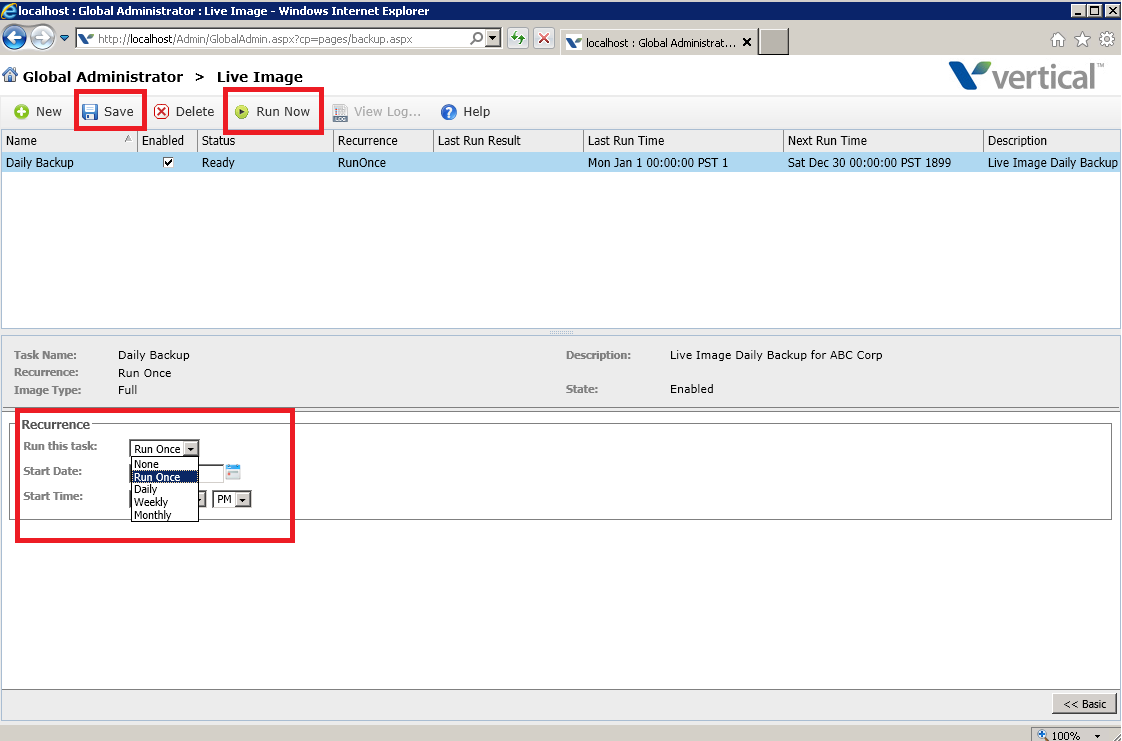
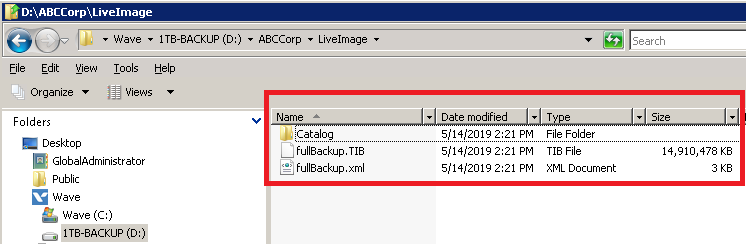
This will take some time, so be patient. Once finished, you should see “Last Run Result: Success” and you’ll have your .TIB file in your specified backup location. Your Live Image backup is complete!
Important! Note that Live Image grabs an image of the C drive only. If you have anything stored on the Wave system’s D drive (voice files, etc), you will need to manually copy the data on the D drive to your desired backup location.
For information on how to perform a Live Image Restore, please click HERE.